Thursday 31 January 2013

Cute Little Shoes

I couldn't resist them! I was in Primark and I saw them and they were only £8.00!

They have bows on and they're black so they'll go with anything!
But, they are sooo uncomfortable :'(
I'll just have to wear them in :P
-Ruby

Wednesday 30 January 2013

I went to Boots today to check out the shade range for the Max Factor 3 in 1 Foundation and I have to say that I am quite disappointed by the choices, The lightest one they had was called Warm Almond and it was far too dark for my skin.

I was really hoping that they would have something right for me because it was such a good foundation, but I knew that there was a high chance of this happening so I'm not too surprised :/

Hopefully I'll find a drugstore foundation in my colour that's just as good :)

-Ruby

Tuesday 29 January 2013

Max Factor 3 in 1 Foundation Review

Hi All! So today's post is about the Max Factor 3 in 1 foundation.
This product is advertised as a primer, foundation and concealer all in one so I thought it would be worth getting a sample :)

A couple of notes;
1. The foundation sample I received was a random colour and it is a lot darker than my natural skin tone, so I am mainly focusing on the coverage, finish, texture and smell.
2. Sorry I look a bit rough haha, had a long day at work :P
3. I haven't labelled this as a first impression because I didn't try it out for the day because it was sooo dark on my skin.

So, here we go!

 <--This is the sample that I received, plain black sachet and in the shade Natural 50, I would have chosen the lightest shade if there was an option, but it's no big deal because it's not like I paid for it :D
 I poured some of the sample onto my hand and it actually looks closer to my skin tone in the picture than it actually is. The consistency was runny which I'm not so much of a fan of as it started moving down my hand as I was trying to hold the mirror as well, not too clever of me haha.
 My face before :) I took so many photos and this was the most flattering :S I have bad skin and this is actually a good skin day for me, but my skin was still a little blotchy.
Just before applying the foundation I cleansed my skin with the Neutrogena Pink Grapefruit face wash and then sprayed on a little M.A.C Fix+ to help soothe my skin.
 I had applied 1 coat of the foundation and to be honest the picture makes it look a lot lighter than it was, I mean it was seriously orange!
Anyway I put on another coat and my word it was amazing! My skin didn't feel caked, it felt smooth and the foundation had covered absolutely everything!

The foundation didn't have a strong smell but it was a pleasant smell. It did leave a slightly dewy finish on my nose but it was also slightly matted everywhere else.


I am definitely considering buying this in the full size, I will see what the shade range is and who knows it might become a new favourite.
They do only have 6 shades (That I know of) and the one I am wearing is the 3rd lightest and as a rule of thumb, if they don't have a good range then they probably wont have my shade.

It retails for £11.99 at Boots
I hope you liked this review and look out for future posts :)
-Ruby


Monday 28 January 2013

I'm going to upload a post about the Max Factor 3 in 1 foundation.
I got a nice little sample size so I can give tat a try :) I hope the shade is ok haha.

Saturday 26 January 2013

OPI Amazing Spiderman Mini Collection Review + Tutorial!

I thought I'd do possibly 1 more post today and it's a review and tutorial of OPI Amazing Spiderman Mini Collection.
I know that its has been out for a while as it actually came out before the film did and I got my hands on it straight away! But logically I thought well I have this lovely nail polish collection that I still have loads of and now a blog, so why not write about it! Aren't I clever haha

So first of all I thought I'd talk about them a little :)

 These are the four colours (From Left to Right);
-Number One Nemesis NLM38
-Your Web or Mine? NLM33
-Just Spotted the Lizard NLM36
-Into the Night NLM34

They are all metallic/glitter colours.


Swatches!!

I applied 2 coats of polish to get the full colour and I'd say that the red/pink colour and the gold/green colour are the most pigmented.

Number One Nemesis - Black with gold/silver glitter
Just Spotted the Lizard - 2 tone green/gold oil slick
Into the Night - Metallic royal blue
Your Web or Mine - Metallic pinky red


 TUTORIAL TIME!! :D


So first use a base coat to protect your nails. My favourite is Sally Hansen Double Duty Base and Top Coat :) It's not too expensive £4-6 from Boots/Superdrug.
 Next, paint your nails in the colours that you want, I used 2 coats for higher pigmentation.
 Then tape off your nail in any sort of crazy pattern!
 Paint the untaped parts with another colour of your choice, I used the darkest polish in the OPI collection.
Let it dry, remove the tape and a voila!
You have a crazy two colour pattern on your nails :)

This can be done with any colours that you want and any pattern too.


I really hope you liked this post and keep an eye out for more posts ;)
-Ruby

First Time for First Impressions

So today I'm going to do my first ever first impressions post!
I'm excited for this because though I'm new to the blogging world I thought I would just dive right in!

The product I am reviewing today is Boots 17 Ultimate Volume Lip gloss in the colour Very Berry.

 <--This is the product, It comes in a simple clear tube and a gloss black lid :) I love it when gloss comes in a clear tube so you can actually see the colour, especially as I don't personally think that the swatches that boots has on their website are very accurate - well at least for this colour. The swatch made it look as though it would be a deep pink/purple where as it is more of a deep pink/red. I think it goes better with my skin tone anyway.


This was just after I applied it for the first time and it was taken at 9:47am just before I left for work :)

The colour is really pigmented but I love it anyway. I did apply a small amount of my Barry M lipstick in the shad 121 which is like a pillar box red :)
There is no smell or taste so I think that can be a good thing, no risk of unpleasantness.

It glides on really smoothly and there is no sort of sticky feeling but as I precaution I always wear my hair back/up if I'm wear gloss because I'm at risk of my hair sticking to the gloss :(


I took two pictures this morning and the first one shows the lip gloss perfectly but I like the second photo.

I really didn't do a lot with my make up this morning, just;
-Washed/moisturised
-M.A.C Fix+
-M.A.C Studio Scult foundation in NC15
-Arch de Triumph by Soap and Glory
-Coco Crazy mini pallet by Max Factor
-Gel Eyeliner by Maybelline
-M.A.C Fast Black Zoom Lash Mascara
-Barry M lipstick in 121
-And of course Boots 17 Ultimate Volume Lip gloss in Very Berry.


When I got to work I decided to take another picture of this and it was at 10:12am and the colour had started to become uneven and wear off.

I wasn't expecting it to stay on for too long but I would have loved it to have been a stain and not a regular gloss.
So if you're looking to buy this be prepared to reapply over and over .

I didn't bother uploading a photo from after work because it had completely vanished though I just had a regular day at work so I was eating and drinking which I think did get rid of a lot of it.


I would certainly say that if you want a regular lip gloss with a high pigment then you should definitely try this one especially as it is only £3.99! So for that price you can't go wrong :)
I hope you like it :)
-Ruby


P.S - Please excuse the awful hairstyle :P

Friday 25 January 2013

Earrings I'm In Love With!

I thought I'd tell you about the styles of earrings which I currently love!

I've gotten into a few styles of earring recently and they're all so different :)
I hope you like them too!

The first one is ear cuffs!
Silver (Silver) Silver Pyramid Stud Ear Cuff Earrings | 262076592 | New LookGold (Gold) Gold Hanging Cross Ear Cuff | 267438393 | New LookCrystal (Clear) Sparkle Ball Earcuff | 262976290 | New Look
What I mainly love about ear cuffs is that if you're the sort of person who loves the pierced look but don't actually want to have the piercings then these are perfect :) They have that sort of look about them. not to mention you can get them in loads of styles. Ones that are just small cuffs - some designed into different shapes and animals, one with chains attached to an earring (which is my personal favourite!), Hangy ones and in so many colours!


The next is fairly similar, I don't know if they are also called ear cuffs but I think they should be separate.
I'm going to call the ear hangers

I just think these are sooo pretty!
They hang over the back of your ear and the chains just hang and again, you don't need piercings for these!

I have one in black with black spikes hanging at the bottom and AB white crystals at the top and the only thing I would say about these is that they might hurt your ear after a while of wearing them, though it could just be me :P


Next is something simple.


Very simple coloured crystal stud earrings. I think they are so cute and just look great with anything.

There is just something soo appealing about transparent colour crystals. I know they're not expensive but they just seem precious to me :)


Wednesday 23 January 2013

Caffeine Free Coke

Doesn't taste as bad as I thought and I can have it before bed time because it won't keep me up :)

Maybelline Fit Me review

I while ago I ordered the Maybelline Fit Me foundation in 120 'Classic Ivory' and this was the lightest shade I could find anywhere. I had heard that there was a shade 115 but when I went to Boots and Superdrug I could not find it and they did actually stock the Fit Me range but the stands were made so that the 120 shade was the lightest available. So anyway here is what I thought;


I ordered the tester tube which looked like this:

So I just comes in a small squeezy bottle, which I like because you know you aren't going to waste any.

As I said before it's shade 120 called 'Classic Ivory' but I don't know if you can tell but from the small amount of my skin you can see compared to the colour in the bottle it is a bit darker.

I wanted to see what it looked like when I actually blended it into my skin to see if it would be lighter than I thought.


OK, so when I applied it to my hand it was quite runny which I really do not like. I much prefer a foundation which is thicker because I just prefer the feeling.

And as you can see, the foundation is still fairly darker than my skin but I was just waiting to see what it would look like once I blended it in.


So when I blended it in it did actually do quite far which is great because then you don't have to use as much.
But it is sooo much darker than my skin tone!

I mentioned in a previous post about how I find it difficult to get a foundation which matched my skin tone and this I think really shows how pale I am haha.

Them smell was all right but it's like a perfume smell which some people will like and others will hate.


All in all I think that if you can find the right skin tone for you it could be quite a nice foundation but as I couldn't and I didn't like how runny it was then I won't buy a full size of this foundation.
However, I will keep it for emergencies and just mix it with some moisturiser beforehand :)
I hope you liked this review.
-Ruby

Sunday 20 January 2013

My favourite make up part 2!

I got as far as writing about my favourite skincare products last time but in this one I really am doing about make up (minus 1 item :P). So I'll just jump straight into it!

The only item in this post that isn't make up is this one - It is my M.A.C Fix+ Spray :)

<-- This is it :) It comes in 2 sizes, The 30ml bottle which is a great travel size and the 100ml bottle which is the one that I have. The spray comes with a sort of lock on the top for when you're not using it. The packaging just looks great, but that not the point of it.

I had looked at a few reviews beforehand just to make sure that I wanted this and that it would actually benefit me. My skin is prone to redness and dryness so this was great :) It really does reduce the redness and it is soo moisturising. I have used it everyday since Christmas and It looks like I have barely used any and I typically use between 2-4 spray to get a full coverage.

I would suggest that if you suffer from dry and oily skin and are prone to redness etc. then you invest in this because it is really worth it. I use it after my moisturiser and before my make up - you can use it after your make up to set it or even just on its own. I feel that it gives my skin that natural dewy glow which always looks good :)  It retails at £13.50 which is entirely reasonable given that M.A.C can sometimes be quite pricey.


Now onto the actual make up;


The first thing I want to show you is the Arch de Triumph by Soap and Glory which is their brow pencil and highlighter duo.

So what I mainly love about this as a brow pencil is that it doesn't go on too strong but it also isn't difficult to work with. I have very fair eyebrows so I always have to be careful that I haven't put on too much because it would really look weird. The colour is very build-able but I would suggest that if you have darker than mousy-medium brown maybe even slightly darker that this might not be the right product for you.

The highlighter is amazing! It is so creamy and really easy to blend, It has a nice vibrancy but looks natural and because it blends so well it does look very natural but helps brighten the eyes. You do need a large pencil sharpener for this but they aren't hard to come by. They do retail at £6.00 so it is one of the cheaper products but its quality is beyond compare :)

Next I have my eye shadows, I do have a few I'd like to talk about so I'll try not to waffle on about them and get straight to the facts.


The first is No7 Smoky Rose Quad Pallet

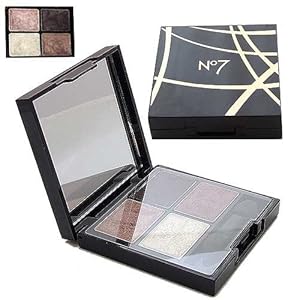
This pallet has 4 different colours, and they are all pearly which I love :)
There is a shimmery white which works really well as a highlighter and using the arch de triumph underneath really helps it to stick.
The second is a rose gold colour which is good for a full lid colour if its during the day so it doesn't look like too much especially if you're only going to work haha.
The third is a deeper rose gold with more brown tones to it and I love to use this one as the lid colour if I'm going out at night and I'm all dressed up because it is perfect with the fourth colour to do smoky eyes :) The fourth is a deep chocolatey brown which looks great in the outer corner of the eye to get the smoky eye look.

I may upload a tutorial on how to use this :)
They actually came as a freebie but I have seen people sell them for £7-8


Next I'm going to do 2 in 1 :)

These are my M.A.C Pressed Pigment eye shadows in 'Her Alter Image' and 'Vile Violet' and these are part of the Venomous Villains collection.


So the top one is 'Vile Violet' and the bottom one is 'Her Alter Image', there was a third one called 'Vainglorious' which is a deep red/burgundy with a slight metallic quality to it, however I love the ones that I have :)

So the 'Vile Violet' is a very deep violet with a matte finish which I like to use in the outer corners on my eye for the smoky look.

The 'Her Alter Image' colour is a pearlised lilac which I use all over the lid and what I like about these is that it really brings out the blue in my eyes :)

They were a limited edition so they are no longer available from M.A.C but I'm          sure if you search hard enough then you will find them :P

I think they retail at the same price as the normal pressed pigments which is £16.50, though it may be different because it was a limited edition.


The next is Max Factor Max Effect Trio in 'Coco Crazy'


This mini pallet includes nude colour which makes for a great highlighter or a very subtle lid colour.

The second is like a caffe latte colour also makes a good lid colour especially if you are going for a smoky eyes effect.

And lastly a darker chocolate colour which I use for the smoky eye effect.

They retail for £6.99 and are perfect for every occasion.


Now I don't have many lipsticks but the one I really like is the M.A.C Venomous Villains

This shade is called sinister and it has a purple/brown/red colour to it. It also has a shimmery quality and to be honest, depending on your skintone, it can really wash you out. I have very fair skin anyway so to stop it washing me out I like to use a lip brush and use only a light amount.

Not only do I like the colour, the smell is fantastic.
It smells like vanilla ice cream and like it's good enough to eat though I wouldn't recommend doing that :P

Again because it was part of a limited edition range then the prices may vary but the price of the normal lipsticks are £14.00


Finally my lipgloss and the only one I use is the No7 Liplicious lipgloss in Sweet Peaches

 This is a pinky shimmery lipgloss which has a nice applicator if you want to use it direct from the tube.

I goes on smoothly and has quite a subtle look so it doesn't  look like overkill :)

It smells really sweet and nice so that's always a bonus but the only thing I don't like is that it doesn't last too long and you do need to keep re-applying it

This retails at £10 which isn't too much to pay but it's also not the cheapest.


I hope you enjoyed this post a and look out for future posts :)
-Ruby


NOTE: I don't own any of these pictures so I do apologise if I am using these without permission.

Saturday 19 January 2013

My favourite make up part 1 :)

I thought I'd do a post about my favourite make up items :)

I love my make up and every time I buy something new it makes me really happy and excited.

Recently I posted about the new foundation that I bought which was the M.A.C Studio Sculpt in NC15.


So far after using it only a few times, I am completely in love with it. Up until a few days ago I was using Maybelline Dream Satin Liquid which I wasn't too impressed with, after a couple of hours the foundation would split and may face would look disgusting. But what I love about the M.A.C Studio Sculpt is that it is really build-able so I get full coverage, It doesn't have a typical foundation smell which I thought was a nice change, it spreads really well so a small amount will go a long way. Because of this I actually believe what the woman at the counter had told me about how long it lasts. The packaging is perfect, because the texture is a little thicker than a usual foundation it means that the squeezy bottle is perfect and you're going to get every last drop of the stuff out of it.

And last but not least, the colour is exact to my skin tone! Which I am soo pleased about as I can never find a perfect match - But this is what I like about M.A.Cs range of products, they all have a really good colour pallet.


The next products aren't strictly make up but I still love them and use them regularly.
It is the Neutrogena Pink Grapefruit face wash, face scrub and moisturiser.
I don't actually have any pictures of these so I've just had to find them from other websites.


So this one is the Pink Grapefruit face wash and I think It works really well, but I have to combine it with the scrub and moisturiser for it to really work. I have combination skin, so I have to use something to clean my pores to prevent spots, dry out the existing spots and then moisturise to prevent dry skin.

So I use this typically of a morning just to refresh my skin after a good nights sleep and it's really easy to lather and smells amazing!


The next is the face scrub which again has the same great smell as the face wash but it also has the small scrubbing beads which help a lot if you get black heads and are prone to spots.

Again I recommend this to be followed up with the moisturiser to prevent dry skin :)


This is the moisturiser in the range :) They also do an Oil-free moisturiser which I find I don't need because the scrub/wash dries my face out.
The product itself isn't oily or greasy and you can't feel it once it's on but it certainly does its job. It has a nice smell and spreads really nicely and evenly without using too much. I've had mine for about 5-6 months and I'm not even halfway through the tube even though I use it regularly.


I would really recommend that if you are searching for new product to use that you try the pink grapefruit range, It works well with all skin types so you just have to look out for the correct products to use with each other.

I hope you liked this and found it helpful and don't forget to look out for part 2 coming soon! :D
-Ruby


Friday 18 January 2013

It's snowing. Again.

It snowing and it's coming down heavy :(
I guess it time for my boots to come out and start wearing hat and gloves :(

On the bright side I bought some hand warmers for just 99p! So at least my hands won't be cold :D

Water Marble

So this is my first nail post and I will be showing you water marble nail patterns.

I first learnt how to do this on YouTube watching MySimpleLittlePleasures. She has loads of videos on this technique. This is the link to her channel youtube.com/user/SimpleLittlePleasues
Rainbow Glitter
Blue with black detail


The technique is really quite simple but it takes a while, can be messy and uses a lot of nail polish.

What you will need:
- 1 cup, paper or plastic is preferable.
- A few cocktail sticks
- Several sheets of kitchen roll
- Cotton buds/ Q tips
- Nail polish remover
- Tape, clear or masking
- 3/4 nail polishes of your choice
- White or nude nail polish
- Base/Top coat

NOTE: You my have to practice with your colours and try different ones together as sometimes the colours wont work together.

So the first step you want to take is laying down some kitchen roll just to avoid any mess :)
Then, fill your cup up with water, filtered is best as it has fewer impurities which may make this harder to do.

Once you have that done mask up the skin around your nail to roughly about half way down your finger but not past the middle joint. You can do all of the first hand you are working with at once but if you are trying this for the first time then it might help to do this one at a time.
My first attempt - I forgot the tape :(

Paint your nails with the base and or nude/white polish. Let this dry thoroughly.
Then carefully drop your first colour into the water making sure that it spreads fully. Then add your second colour into the middle of the first colour and hopefully it will spread just as much as the first. Keep dropping colours into the centre of the previous polish until you have built up a bullseye which has around 10-20 rings. You have to do this fairly quickly because you don't want the polish to dry before you get to the most crucial step.

Grab a cocktail stick and swirl it around in the water until you have the pattern you want :)
Then, facing your nail down parallel to the water, dip your nail in. Keep your nail there until you have swept away the excess polish with a cocktail stick. Your pattern should have transferred onto your nail. Allow this to dry before you remove the tape. once you have removed the tape then just clean up with your cotton bud/Q tip and nail polish remover.
One nail done.

Finished! :D


My personal favourite ;)


I hope this has been helpful and have fun and good luck trying water marble! :)
-Ruby

Thursday 17 January 2013

My Amazing Shoes!

So for Christmas my boyfriend told me that I was getting 2 presents but would not let up as to what they were. Then on Christmas morning I'm opening my presents and I get to this huge box and I have no idea what it could be. I open the wrapping and can instantly tell that its a pair of heels, then I question what air of heels could he have gotten me. Only the best shoes in existence!!!
I had seen them when we were walking through town and I saw them, wanted them, couldn't afford them.
But how awesome are my shoes!!!!

I should also mention that these are Jeffree Campbell Shoes and they are called 'Battle Spike', you can get them in black and also a tan/nude colour.

Purchases of Today Part 2

So after I went to Lush I said to myself 'Right you're going home you don't need anything else.', until I saw the M.A.C counter and decided to buy something else :)

I haven't ever tried M.AC foundation before so I am very excited to try this.
I recommend that If you haven't tried it before then you ask to have someone help you find your right colour.
I went for the 'Studio Sculpt' in shade NC15.

I have a very light complexion but when I had the colours tested the woman said I could get away with either NC15 or NW15. From what I understand the C and W in the codes mean cool or warm in reference to the shades so you really do get a perfect match for your skin tone.

So looking at the packaging the tube it comes in does not look like it holds a lot. The woman at the counter did assure me that it lasts for a long time so that we be something that have to update on :)

My review on this product is purely based on when the woman in the shop applied the foundation to my face. It felt like it was easy to put on, very smooth and spreads well, has a very good coverage and lasts very well.

However this does retail at £24.00 so it is a little pricey, well for me anyway


So my rating for M.A.C Studio Sculpt is 4/5 :)

Purchases of Today Part 1

I went shopping today :)
I'm going to show you what I bought.
First of all I went to Lush and for one thing only. 'Toothy Tabs'.
I saw these a while ago and was a bit hesitant to buy them because I was very confused by them, but today I decided that it was time to give them a try.
As I'd never used them before I thought I would ask first. The guy at the counter told me that if you've never tried them before then it is best to start off with 'Dirty' tabs first. I think this is because if you're not used to Lush then it probably helps to start off with something familiar, something minty.

So they are a bit quirky looking and to be honest a little odd to use at first because most people are used to using a paste and have not experienced anything else.


It explains that you have to essentially crunch the tablet into small bits and then use a wet toothbrush as normal, the tabs foam up and from there it is pretty much normal. The weird bit about that is that you have these tiny bits of solid toothpaste going around your mouth because they haven't yet foamed and it just feel wrong, certainly something I could get used to though.

They do actually have a very pleasant minty taste to them but when I first put it in my mouth it had that very characteristic Lush feeling about them.

The 'Dirty Toothy Tabs' retail at £2.00 per pack and contain 40 tabs.
The prices of the other varieties of 'Toothy Tabs' do vary a fair bit but I think they were no more than about £4.50? The ones that I picked were the cheapest because I didn't want to pay too much for something that I didn't like.

Hopefully you only have to use them as regularly as you would normally brush your teeth but I will get back to you when I have finished the pack and tell you my full verdict.


From my first try I give it a 5/5 because they are easy to use, nice tasting and quite effective :)

Let's get blogging!

Hi, I'm Ruby and I like make up, nail stuff and everything beauty :)