Showing posts with label Tutorials. Show all posts

Wednesday, 5 February 2014

How To Get The Perfect Eyeliner

Recently I did a post about how to get perfect red lips and I thought I would continue this series by talking about eyeliner. It can be super frustrating trying to get your eyeliner to match and just look generally great. I personally have totally ruined my make up because I messed up on the eyeliner and it can really put me in a mood when my makeup doesn't go well.

So without further ado (and I fear that this could be a long post) I'm going to get on with it!

1. Clean Canvas
Obvious stuff really, you never apply make up to a dirty face. So I've made sure my face is clean and the rest of my makeup is applied apart from the eyes.
 2. Eyeshadow
I know that eyeliner can have a tendency to shift and fall into the crease so I have prepped my eyelids with a primer and some eyeshadow. I have used the Elf Eyelid Primer and Limit, Nooner and Strange from the Urbadn Decay Naked 3 palette.
4. Down to the nitty gritty
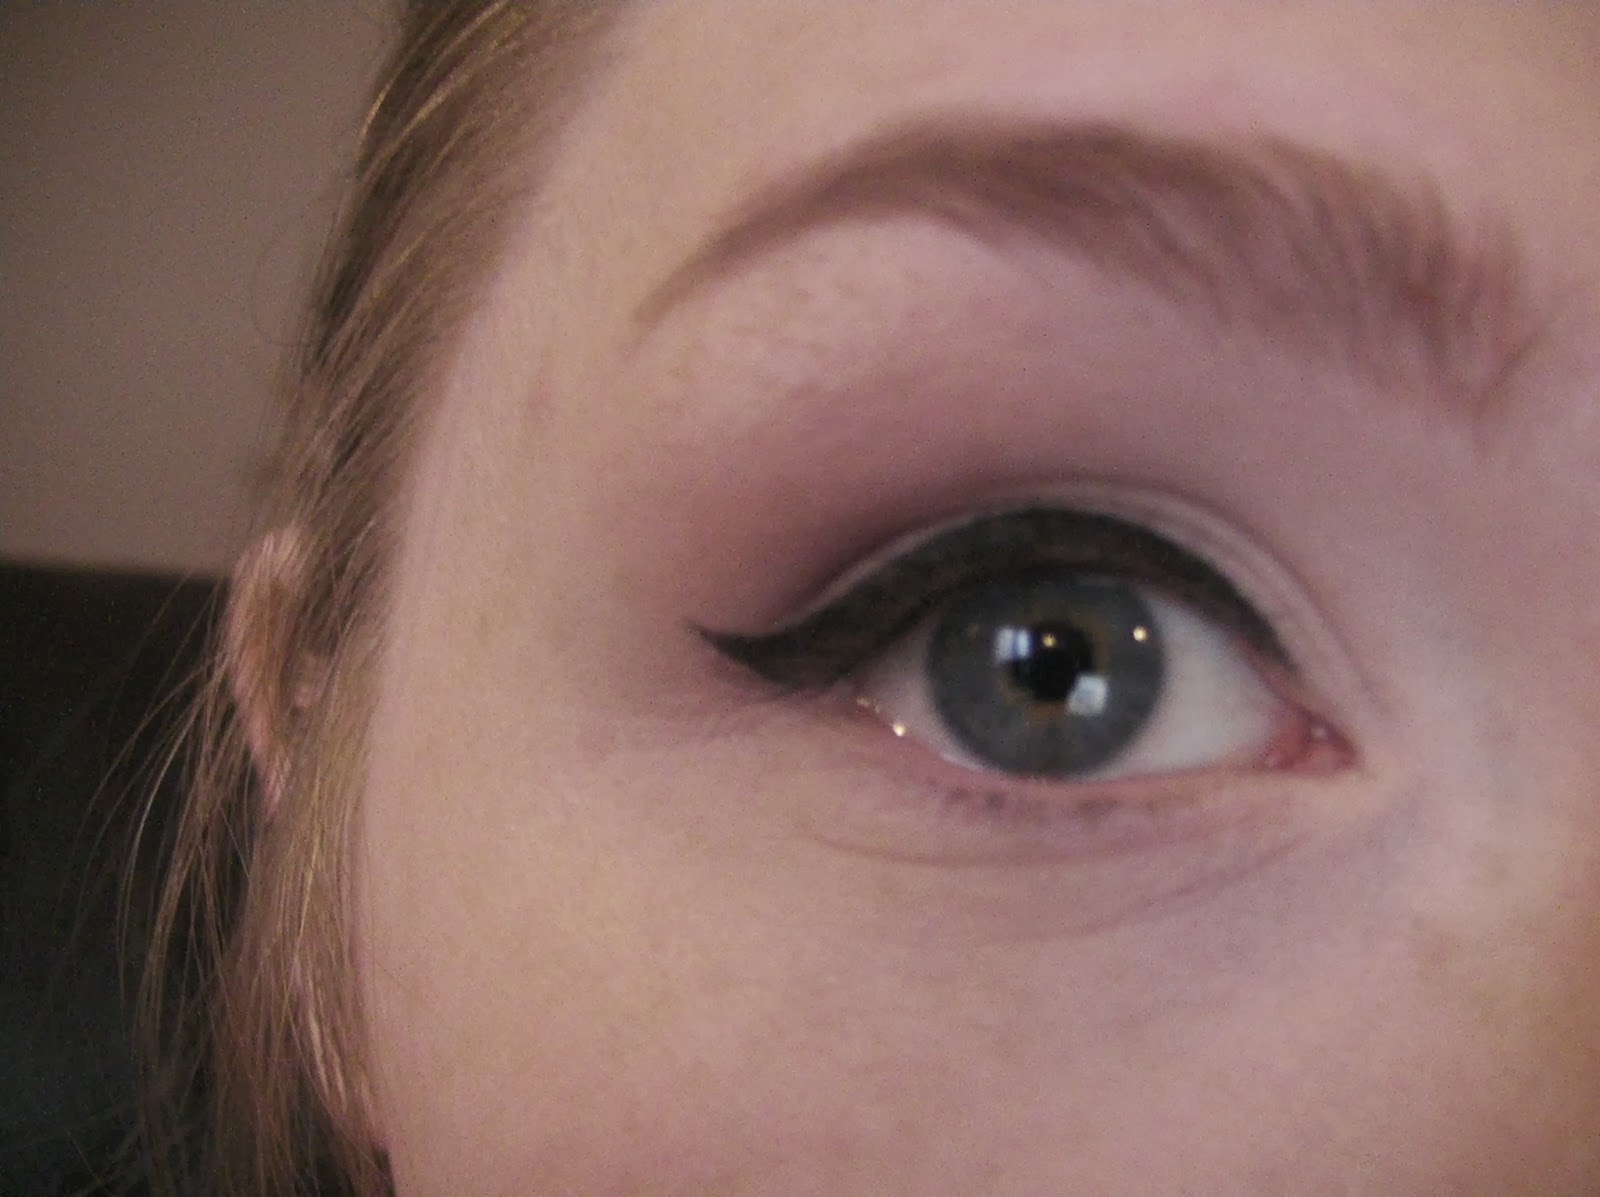
So here is a series of pictures to show you how I do my eyeliner:

- Draw a fine liner close to the lashes in the centre of the lid, I find that this helps me get my bearings and makes the rest of the liner easy to apply.


I've just drawn a thin line right across the lashline and you could leave it like this if you just want to intensify the volume of the lashes.
 Now I'm just building on the thickness of the line and because I already drew in the original line then it has made this a lot easier. I'm starting from the middle and then filling in either side,
 Again you could just leave it like this if you don't want to wing it out and just add some mascara to complete the look.

 I don't know if it's difficult to see or not but I have drawn a mark where I want the liner to come to a point, this makes it easier to make both eyes even because it gives you a chance to double check that it all lines up.
 Connect the bottom line to the point
 And then make a top line from the point back to the lash line and make sure it blends in smoothly.
 Now you can just fill in the gaps, I recommend using a liquid pen liner or a sharp pencil liner if you're a beginner, mainly because you should be used to the feel of a pen/pencil whereas a brush may feel a little alien.
 If you're super comfortable and confident you can really darken the look by taking a pencil eyeliner (preferably a soft textured and long wearing one)
and tightline your eyes. 'What is tightlining?' I hear you say, well this is just lining your upper lashline with eyeliner, it sounds scary and is quite scary when you first try it but it is all about confidence. It is totally worth it though.


Now just finish by curling your lashes and applying some mascara.


So here's a nice little run down of my top tips for you!

1. Keep clean - make sure that all your equipment is sterile, remember this is going near your eyes and if your stuff isn't clean then you could end up with an infection - yuck!

2. Use a pen/pencil if you're a beginner - Like I say I think this is the best option for beginners because you're probably used to the feel of a pen/pencil.

3. Guidelines, it is much easier to apply liner if you set yourself out some guidelines. mark the thickness and length of your liner and it jut becomes a game of connect the dots.

4. Cotton buds/Q tips - It's easy to make mistakes but it's nothing that a little makeup remover and a cotton bud can't fix, they are super handy and help make your liner look sharp.

5. Tape! If you're having an issue making a wing the take some tape, just press it on the back of your hand to lose some of the stickiness and then place it on your eye from the outer corner going outwards at the desired angle that you want your wing to be and then it just becomes foolproof! Once you're done you can remove the tape and you'll have a super crisp line.

6. Black shadow - sometimes you can come across eyeliner that just takes an absolute age to dry, I recommend using a fine brush and applying some matte black shadow over the wet liner to set it. It will stop the liner from smudging too :)


If you have any great suggestions about liner then let me know in the comments!
- Roo xx

Friday, 31 January 2014

Perfect Red Lips

I've seen a few posts on how o get the perfect red lips and I thought I would give my take on this.

Red lips can be so intimidating for people to try but it is really about confidence, I think you won't truly look good in red lipstick if a) You can't apply it well and b) You don't feel comfortable wearing it. So if you feel like you're ready to give it a go then keep reading for my top tips!

So here's my application:

1. Start off with clean lips.
Remove any product on there are for perfect application use a lip exfoliator to remove any chappedness, this is especially important if you are going to use a matte colour because it will cling to the skin flakes and look terrible!

Before applying any colour use a treatment lip balm, lips can tend to feel super dry after having lipstick on for a long time. So try to give them a treat before and after to keep them in good condition.

 2. Use a lip liner.
This will help to firstly prolong the wear of your lip colour and secondly help intensify the colour.

Try and find a lip liner that will best match the lip colour. I also think a benefit of using a lip liner before lip colour is hat you can draw out the shape as a guide and it will make it easier and less scary to put the lipstick on.
Fill in the rest of your lips with lip liner, it will just help to keep the colour on everywhere and keep the colour even all over the lips.
 3. Choose your colour

There are so many shades, tones and finishes to choose from. This isn't just for red either, especially with MAC I have noticed the astonishing range of finishes in so many different colours. If you don't know what to go for then I would suggest that you speak to a MAC Consultant and they can help.
4. Apply!
I am using MAC Russian Red, this is a super intense deep red. It's a matte colour (it does look slightly glossy because of the lip balm but that does fade).


Here's a rundown of my tips and tricks to make your red lip flawless!

1. Choose the right colour for you
As I said there are so many options but mainly the issue is choosing the right undertone. If your skin has a cool undertone then you want to go for a blue toned red (like me!) and if you have a warm undertone then you should go with more orange based reds. If your a lucky duck with a neutral undertone then everything works for you!

2. Treat yourself!
Yeah you can go and buy an expensive red but that's not what I mean! You need to prep your lips for any colour to keep application smooth and flawless. I recommend a good lip scrub (my favourite id the Elf Lip Scrub) and then choose a treating lip balm to condition.

3. Keep within the lines
As mentioned before I think it is good to have a lip liner, it's not necessarily essential but it helps and you will see the difference in colour, application and crispness of the lines.

4. Powder power
Again not an essential step but I highly recommend for matte lipsticks and it again will help the staying power of your lipsticks. What you should do is apply the lip liner and lipstick and the blot of any excess, then apply a thin layer of loose powder and reapply the colour to finish. It just helps the colour grip onto something and last.

5. Winning smile
No one wants the dreaded lipstick on teeth situation. It's so embarrassing if your chatting away thinking you look good and then you look in the mirror and see big red marks on your teeth. To prevent this you can blot your lips with tissue after application to avoid excess or more for something more amusing put your lips around your finger and slowly pull your finger out, it will take away any excess that was too close to your pearly whites.

6. Clean it up!
If you're having trouble keeping within your lip lines then a good finishing trick is to grab a fine brush and concealer that matches your foundation and run it round the edge of your lips to cover up any mistakes. It will make the shape of your lipstick look super sharp.

And those are all the tips I have!
If you have any amazing tried and tested tip for red lips or lipstick in general leave a comment :)
- Roo xx

Friday, 27 December 2013

Essie Sleek Stick Nail Stickers Review/ First Impression/ Tutorial

I know that this is the 3rd post of the day and I have got loads to show you. I'm just going about my daily life and just finding things that I want to show you so I thought I'd share this one. I got 3 sets of these nail stickers by Essie as well as 6 of their polishes :) I've never tried nail stickers before  nd I always feel a little skeptical about them because I have 1 really weird shaped nail and I just think that the shapes they give you are only going to work on those who have perfect shape nails. Anyway, here are my thoughts/tutorial.

 So I am using 09 Stickers and Stones.

It is a simple brown/grey colour with bubbled gem style details on the side of the nail.


So I have trimmed my nails down so that they are all even an filed them straight. My hands are thoroughly clean and sanitized.


So I applied one of the appliques and to be honest I really like it so far!
They have good sticking ability and fit on my nail quite well.

They give you 14 stickers in a set so that at least you have some options about size.
 So here it is before I've trimmed it down (sorry the picture's blurry).

You just need to make sure that it fits your nail alright and that it is properly stuck down before trimming the sticker.
 And here is the final result!

I did have a little bit of an issue with some of the edges not sticking down so well but I fixed this by just applying a bit of base coat underneath like a glue.

So I really like them so far, hopefully they will last as long as they say they will but I guess I will find out!

- Roo xx


Saturday, 21 December 2013

Day 5 Christmas Nails!! Deck the Halls

So I have been really trying to get these uploaded for you and I hope that you appreciate the effort considering that it is 4 days before Christmas and I have yet to finish my wrapping! Jokes :P All aside I love anyone who reads my blog and just that makes me happy enough - I will however feel quite disappointed if I can't get these finished in time :/

But anyway, Here is day 5!

Fairy lights!


PS, when I have just uploaded the photos I realised I did such a crap job of documenting this. So it just jumps really far :S

So I hear you ask, 'what will I need for this?' Well it's your lucky day because I'm going to tell you!

- Glittery Green Polish
- Black Nail Polish
- White Nail Polish
- Red Nail Polish
 - Yellow Nail Polish
 Clean nail and I'm just going to mention this part because my mind failed to remind me to take pictures.

Take a base coat and apply that before anything else (Obv!)
Then take the glitter green polish and apply a few coats of that to build up opacity and when that's completely dry you can move onto the nail art.
 As you can see I did kind of skip ahead a little, but this is where you should get to after this next step.
Take the black polish and draw the wire for fairy lights.

You can make this as random as you like which is what I like about this design. Really use your imagination and be as creative as possible.
 Take the red, yellow and white to draw the bulbs.

You can choose what ever colours you like but I thought that these would look the best. So add as many bulbs as you like.

Add a top coat and then the look is finished.

I really hope you like this and feel free to share your designs with me too.

-Roo xx

Friday, 20 December 2013

Christmas Nails Day 4! Gingerbread Manicure

This is a super simple design as you really are only painting your ring fingers, I think it looks so sweet and really elegant for the holidays.


So what you will need;

- Light brown polish
- White polish
- Black polish
- Red polish
- Cocktail sticks
 Pictures sideways but oh well!

Clean nails! Make sure they are all uniform and well treated.

 After applying a base coat take the brown polish and draw out a little ginger bread man shape on your nail. Then let it dry befre we add any detail.
Take your white polish and with either a cocktail stick or a nail art attachments draw on little buttons and trim on the arms and legs.
 Take a cocktail stick and with the red polish add colour to the little buttons and add a smile, a bit like strawberry laces!
 Take the black and add some eyes. Your nails are now done!

Super simple and really easy to do. Try it out and let me know how it goes for you all!


- Roo xx


BONUS PICTURE!!
So I really had to include this because I thought it was amazing but as I was taking the polish off, this happened!


He stayed in tact and I just thought it was soo beautfiul that I really had to share this with you :D

Day 3 Christmas Nails - Candy Cane

I mentioned in a previous post about the consistency of the posting of these nail tutorials and to be honest I've been quite bad with it. I have long days at work and when I get at home I feel stupidly tired (I legit nearly fell asleep in my dinner tonight) but this shouldn't be an excuse, especially if I promise to do something, so I'm sorry for delaying this and keeping you all out of the loop a little. But anyway, I'm going to do bulk uploads of these tutorials to get them done before Christmas which is when I said that I would get them up by - actually I said a week before Christmas but that is no longer an option (sorry!)

Here we go!

So you will need;

- Base/Top coat (Sorry not pictured)
- Red polish
- White polish
- Glitter coat (optional)
- Striping brush
 As per the norm, strip your nails and make sure they are perfectly clean.

 After you've applied a base and let it set, put on a coat or 2 of your white polish.

Make sure that it id completely covered and there aren't any sheer patches.

Let it fully dry, like not just touch dry but really dry.
 Take a striping brush or the nail polish brush (if your certain you can get a neat line) a paint red lines across in whatever direction you want. I chose to do mine diagonal because I prefer it.
 Continue to do this to the rest of your nails until it looks like this.
I added quite a few coats of glitter because I think it adds something and who doesn't love glitter!


This is the final design I hope that you like this tutorial and I will try my best to get the rest uploaded asap.

Roo x

Tuesday, 10 December 2013

Day 2 Christmas Nails - Snowy Rudolph

I know that I am posting day 2 before day 1 which it very confusing. Day 1 is actually in video form and is undergoing final editing, I tried to upload it but it failed so I have to start again :(

Anyway, I am going to alternate between YouTube and blog just to try and keep new posts coming in on both. I really love this one, I just think it looks so pretty and it's perfect if you work somewhere where you can't have bright coloured nails or anything too flashy :)

On to the tutorial!

What you will need:
- Nail file (as always, neaten up those edges!)
- Top/Base Coat, mines Sally Hansen Double Duty
- White nail polish, mine comes in a handy little nail art pen :)
- Light brown nail polish, I can't remember the name of mine but I know it's by Bourjois.
- Red nail polish, I chose a metallic because it adds a bit  more dimension to the design.
- Black nail polish, mine a Nails Inc./Kate Spade one because it came with a magazine haha.
- Rainbow glitter top coat.
- Cocktail sticks (For fine detail)

So clean, file nails as always, I'm just going tot apply a nice even layer of the base coat. Leave it to dry for about 5-10 mins before moving onto the next step.


 One that has dried you can add little random white dots on your nails. It looks good either uniform or random because we are going for a snow look. If you don't have a nail art pen like the one I have then the cocktail stick come in super useful. Failing that you could use the end of a paperclip, a flat bottomed pin or anything with a fine point, be creative!
 I got excited and skipped ahead a little before taking any more photos haha, sorry!

with the brown nail polish just make the shape of a reindeer hear and antlers, again cocktail stick of details :)

Dab on the red nail polish at the bottom of the nail so it looks like he's peering over :P
 Take the black polish and you should know by now what we need to do the eye, that's right - Cocktail sticks!

make them big enough to stand out but not too big that they take over the design.


And some glitter! Everything looks better with a little glitter!


And you're done! It's so simple but I think it still looks really festive.

Anyway, stay tune because I will be posting more but not for a few days, I'll have to upload quite a few in a day for you but I am away in Brussels as of tomorrow :D Ahh excited!

Anyway, I'll keep you posted.

- Roo xx

Friday, 6 December 2013

Upcoming Project! - Twelve Days of Christmas Nails!

So if you have read an earlier post of mine then you will know that I am doing a set of nail tutorials based on the 12 days of Christmas. I have had a look into this and (after much care and thought going into this!) It would be very difficult not to mention strange to have leaping lords and milking maids on your nails. Not only that but you also can't fit 12 individual things on 10 nails unless you are willing to compromise on space and quality of design.

Any who, I don't want to disappoint you all so I am still doing this but it will be based on very recognisably Christmassy things instead of based on the song. I thought that this would also be a lot easier for everyone if they were wanting to try them out for reals!

More to the point, today is the first day of filming and if I don't get this up by today then it will certainly be by tomorrow or Sunday at the very latest. I am trying to work in a way that I will get all of these designs done for you and still give you plenty of time before Christmas to gather your supplies.


Be sure to keep an eye out for these and I will speak soon!

- Roo xx

Sunday, 1 December 2013

The Not Quite Ready For Christmas Nails!

I thought that it would be a good idea to show you a nail idea which is perfect for those of us who can't accept that it's close to Christmas and are generally not prepared, but also want to try!

 This is going to be your equipment for this look, not much but that's perfect for this look :)
- Boots 17 Magnetic Nail Polish - I have a deep green colour but I don't know the name haha. Also these magnetic polishes are half price in Boots at the moment but I think you need to claim your voucher with your Advantage card.
- Boots 17 Glitter Top Coat
- Sally Hansen Double Duty top and base coat
- Nail File

My nails are looking a little messy but anyway. It's always good to start off with clean hands and neat nails, so file down any rough edges and make your nails about the same length.

Apply a base coat with the Sally Hansen Double Duty or any base coat you prefer, this helps to prolong the wear of your polish and to also protect your natural nail from the colour of the polish your going to use.

This is actually my first time of using a magnetic polish and though they have been around for a long time I have never seen the need to buy it. This actually applies really thick and and you will only need one coat. Whilst the polish is still wet, use the magnet on top of the lid and hold close above your nail for a few seconds. Try not to touch your nail with it, pull the magnet away and you'll see the pattern emerge.
This is the finished result once the magnetic polish has dried, it has an amazing holographic effect and is just so effortless to do.
 After your nails are dry apply 2 coats of the glitter top coat, depending obviously on how glittery the polish you have chosen is.

And Here we are! The finished result! I love this design because it is perfect for the purpose, the colour is Wintery and the glitter add a little something but it doesn't outright look like Christmas nails.


I really hope you like this look and let me know if you give it a go.
Also, I have a special project coming up for which I have to be super dedicated! I am going to do themed nails based on the 12 days of Christmas and I have a few ideas for some but this is going to be a challenge, I will try and get all of the videos up for about a week before christmas to give you all a chance to get your supplies and give them a go :)


So keep your eyes peeled :)

- Roo xx