Showing posts with label Daily Make up and Outfits. Show all posts

Friday, 1 November 2013

Skincare Routine!

Lately the only posts I have been doing have been about my YouTube schedule (which is a total failure and I apologise that I can never keep to a set programme) so I wanted to do something a little more beauty related and I think this is an overdue topic. I get that if you have seen pictures of me then you will be thinking 'Why do I want to know what her skincare routine is, her skin is terrible'. But I have to say a few things first before we start this - Firstly, My bad skin is genetic and I am working on making it better but it is a little tougher to fix. Secondly, I am showing you what is currently helping my skin improve, I have seen a massive improvement in the quality of my skin so I am proud of that. Finally, I know my skin isn't as bad as some people and I am actually thankful that I don't have really bad skin but I have to say that it is hard to face a camera with bad skin and I feel good about sharing my experiences with you all!

So lets not ramble any longer. Here we go!


Step 1.
I like to remove my makeup with an oil based makeup remover because it gets rid of everything and feels a lot more gentle on the skin around my eyes.


Lately I have been using this one by Johnson's. It is the Daily Essentials Eye Make-Up Remover. It is really effective and totally inexpensive and retails for around £2.50


Step 2.
I was using the Anti Blemish Solutions Cleansing Foam by Clinique but it ran out pretty fast which was a little disappointing because it's a great product but now I'm using the Face soap for dry-combination skin which is like a solid version of the foam and it lasts a hell of a lot longer!

Facial Soap with Dish 150gThis sells for about £14.50 and it's a relatively big bar of soap! I know that a lot f people tend to avoid using soap on the face because it can be drying and can clog the pores but this product has been tailored specifically to a particular skin type to avoid this.


Step 3.
Clinique has this three step system which I am using and the first Clinique product I use is part of that system. Anyway, the second step is a clarifying lotion and you can get several different three step systems for different skin types but mine is the anti-blemish.
Anti-Blemish Solutions Clarifying Lotion
  This is a love-hate product, I love it but I can see why others may dislike it. You need to shake it before using it because there is a white precipitate at the bottom which needs to be mixed in. If you have any open wounds on you face like I do then you will find a lot of pain with this, it stings like a mutha! But it makes your skin feel so clean :) This sells for £17.00 individually but you can buy the entire half size three step for £30.00.


Step 4.
This isn't sold as part of the three step but I think they recommend this to go alongside the anti-blemish solutions system. Anyway its the Spot Treatment Gel, this also stings so bad on open wounds! It does wonders for healing blemishes I would say that it realistically takes about 4-5 days to remove a spot. I generally find that the treatments which claim to reduce redness in 4 hours never work!

Anti-Blemish Solutions Spot Treatment GelOnce you get far through this product it because a little annoying and you need to keep it upside-down to get anything out but otherwise it's amazing! This is about £14.00 and worth every penny!


Step 5.
This is the final part of the three step. I find this part the relief stage after you've applied all the stuff that stings the crap out of your face. The Clearing Moisturiser is really light and spreads quite well, I like the fact that it's not massively moisturising because I use other product after and I think it would be over kill for my face.
Anti-Blemish Solutions Clearing Moisturizer
This sells for £18.50 and from what I've heard this helps create an anti-bacterial barrier on your skin to prevent further breakouts - Double amazing!


Step 6.
A little but of a luxury here. I got it as a present for my birthday a couple of weeks ago and it was something that is relatively new and I really wanted to try! It's the Lancome Dreamtone Dark Spot Corrector in 1. This is supposed to even out skin tone and reduce redness, for which I have a lot.


 This is a total luxe product at £69.00 but I am hoping that it will truly improve my skin. I love the feeling of this product on my skin and it does help moisturise so I have high hopes for this and I will let you know my full thoughts within the next few months.


Step 7.

Of course eye cream is important and I use Repairwear Laser Focus Wrinkle Correcting Eye Cream and I know that people will be thinking 'But Ruby, you're only 20 years old! Why do you need stuff for wrinkles?' and I don't need anything for wrinkles but I don't see any harm in taking early action to try and hold off getting them.
NEW Repairwear Laser Focus Wrinkle Correcting Eye CreamI only have a sample size but the full size is about £30.00. The size I have is lasting a very long time though so this pleases me :)


Step 8.
This is a new product but not a new step. I like to exfoliate my lips, I have been using the Lush Lip Scrub in Popcorn but it is a little messy but tastes so good! I have today switched to the Elf Lip Exfoliator which I am soo in love with. I scrubs really well, smells great, tastes great and leaves my lips feeling so hydrated. But I do follow this up with Maybelline Baby Lips just to add extra moisture.


  They really aren't that expensive, Baby Lips is about £2.99 and the lip exfoliator is about £3.75 (I think)


And that's it! Well for the most part. Some days I like to use GlamGlow if I feel like I need a little help with my pores and flaky skin.

I really hope you like this and let me know what your routines are!

-Ruby x


Friday, 27 September 2013

Violet Makeup

Here is a makeup look that I created today incorporating the colour violet.


Products used;

Skin;

- MAC Fix+
- Clinique Anti-Blemish Solutions Foundation in Alabaster
- No7 Airbrush Away Primer
- Revlon Nearly Naked Pressed Powder in 010 Fair
- Collection concealer
- Benefit Fakeup in Light


Cheeks;

- NARS Blush in Deepthroat
- NARS Highlighter in Albatross


Eyes;

- Benefit Instant Brows pencil in Light
- Urban Decay Primer Potion
- MAC Opalesse Extra Dimensions Eyeshadow
- MAC Her Alter Image Eyeshadow from the Venomous Villains collection
- MAC Vile Violet Eyeshadow from the Venomous Villains collection
- Maybelline gel eyeliner in black
- Revlon white eyeshadow from the Colorstay Adventurous pallet
- Clinique black eyeliner
- Smashbox mascara (Can't remember what it's called)
- Katy Perry false eyelashes with purple strands


Lips;

- Maybelline Baby Lips in Hydrating
- MAC Ruby Woo Lipstick
- MAC Vile Violet Eyeshadow from the Venomous Villains collection (For ombre effect)


Nails;

- No7 metallic purple nail polish (Can't remember what it's called)


Anyway, if you want a tutorial on this look then just let me know in the comments :)


- Rubyx

Sunday, 25 August 2013

Smoky Eye Tutorial!

It's been a while since I have done a tutorial and I think I'm a little overdue. It's late but I've got my coffee and I'm ready to go!


Currently it's 11:20pm and I'm just about to get started :) Here we go!

Obviously we need to start off with a clean and fresh base canvas to work on.

I have just used Boots Essential Cucumber Eye Make-up Remover which is nice and gentle and also has a very soothing effect.

I have already done my brows before I got started just to save a little time.

Also a little note, you will have to excuse the state of my skin - I't having a little melt down and I'm suffering from a few annoying blemishes :/
 Right, so I have applied a primer before I get started. 

I have used Smashbox Photo Finish Lid Primer. This primer is particularly useful if you have a little redness around the eyes as it has a nude pigment.

You can use any primer and usually I would use Urban Decay Primer Potion but as I do have redness I decided to change it up a little.


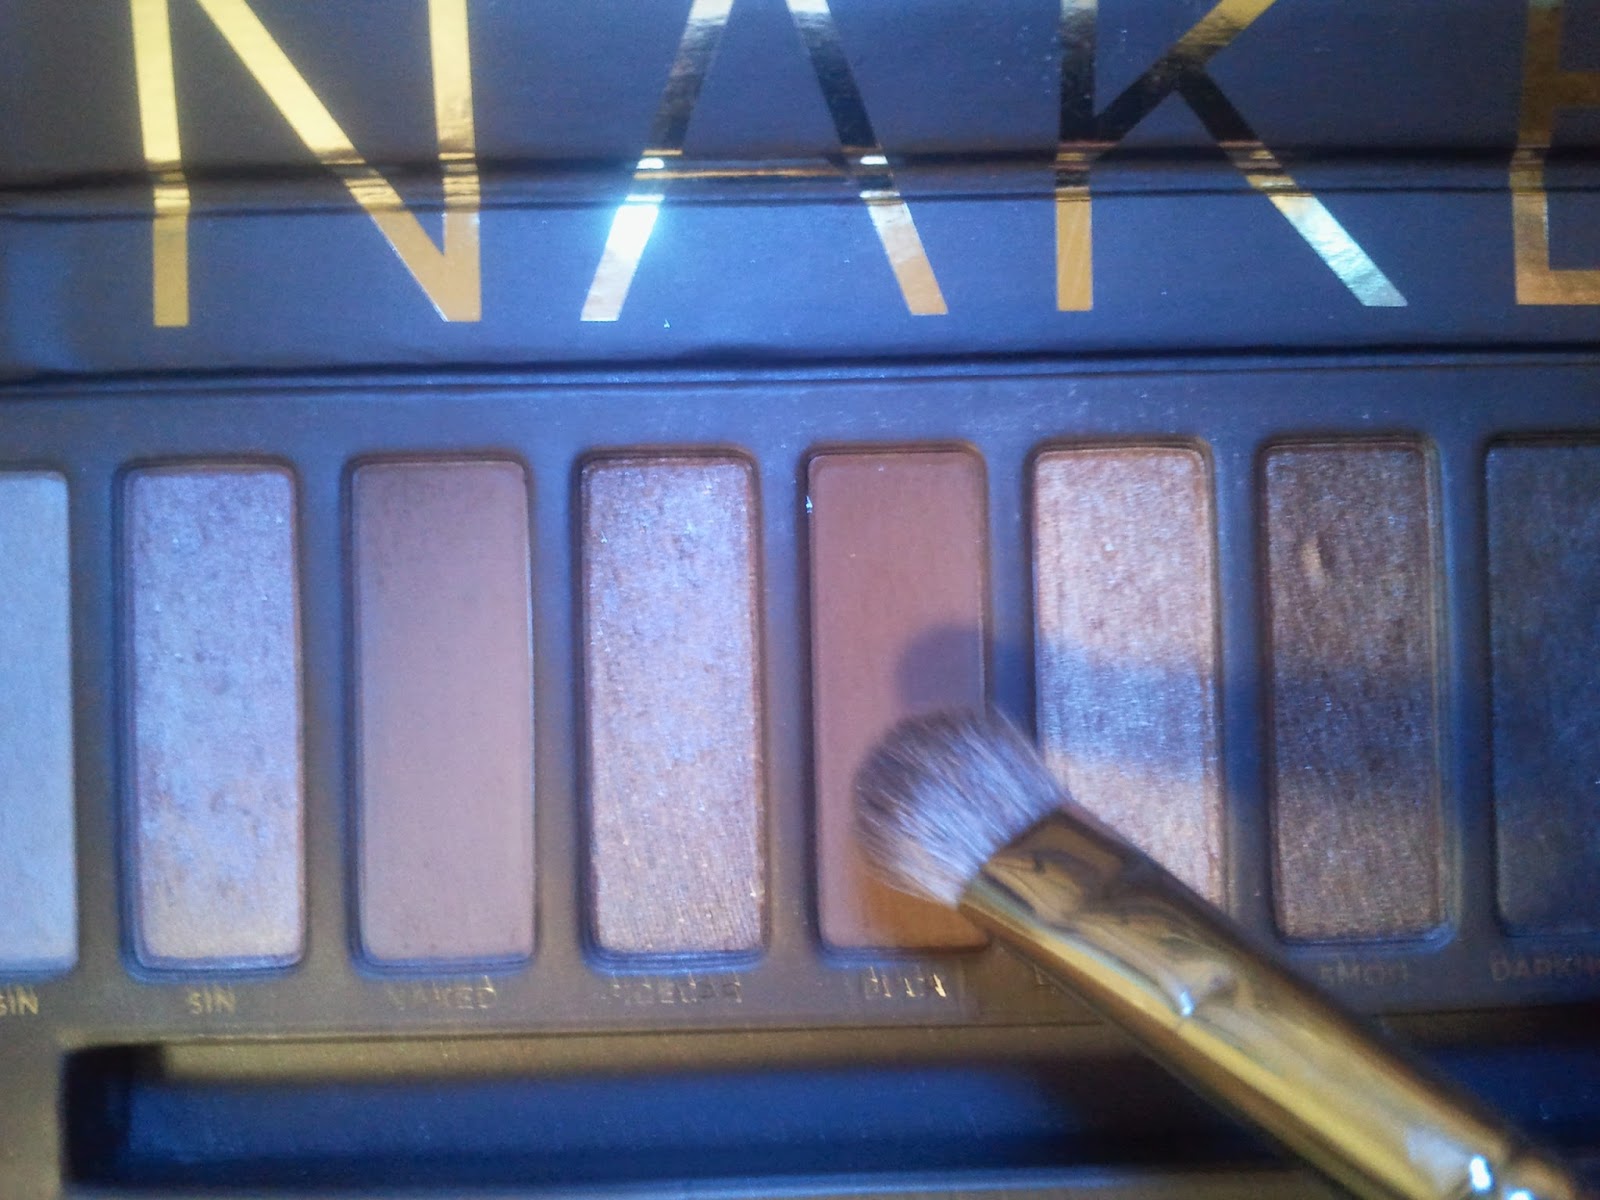
I am solely using my Urban Decay Naked palette for this tutorial and first of all I am covering my lid with 'Naked'. This is probably my most used colour because it is so versatile. This helps even out the colour of my lid and provide a base for the other colours I will use.


I have then applied 'Buck' which is a slightly darker shade onto the outer corner/crease. This helps build the colour and intensify the darker colours.

 
Next is 'Smog'. This is a bronze shade which I have applied from outer to mid lid. There are actually only 2 matte colours in this palette (Naked and Buck).

 I then used 'Darkhorse' which apparently I didn't not take a picture of :/

But it's a lovely dark bronze colour :)

 I did take a picture of the next one! The darkest colour is 'Creep'. It's a shimmery black and to be honest the photo makes it look less intense than it actually is!


The arrangement of these photos are going to come out a little strange but in this one I have applied 2 at once! I'm really good at this haha.

Any way, I have 'Virgin' on my browbone and 'Half Baked' on my inner corner. They are both shimmery so I have only used a small amount.


 I had a bit of a decision on whether to use gel or liquid eyeliner, but I chose gel because personally I think it wears better and I have better control especially when doing a wing :)

I took a black eyeliner pencil and tight-lined my eyes. To do this you fill in the upper lashline, this helps make your lashes look fuller and longer when applying mascara.

It's a little difficult to do at first but you just need to get used to having something that close to your eye. I personally think it's a lot more sensitive than the lower lash line. I twitched a lot when I first tried it and made an absolute mess haha!

 Before applying mascara it's important to curl your lashes. This helps lengthen your lashes once you've applied mascara as you can see more of the lash.


Finally apply your mascara. I chose to use Lancome Hypnose Star and Lancome Hypnose. I recommend using 2 mascaras to help both lengthen and volumise your mascaras. I find that I have different mascaras that are good at doing one or the other to using both means you get the best effect.

You want to be sure that you don't over do the amount you apply of either mascara, you might end up with clumpy lashes and that's not a good look for anyone!


Let me know if you liked this tutorial and keep an eye out for more to come!

- Ruby x

Saturday, 2 March 2013

Classic 50s Make Up Tutorial

I had to test out some of my new make up and I thought it was a perfect time to do another tutorial!

So this is going to be a 50s/ classic sexy look which is great for all hair/skin colours.
Remember, if you have pale skin go for red which have bluish undertones.


Step 1. Cleanse

You want to start off with a fresh clean face, as always.

I have cleansed with Neutrogena   Pink Grapefruit Face Wash,
moisturised with Neutrogena Pink Grapefruit moisturiser and then sprayed a little MAC Fix+.

So just do your normal skin cleansing routine, just whatever suits your skin type :)
 Step 2. Face

I have put my hair back and applied 2 layers of foundation to help get better cover.

I'm using a sample of the new Lancome Teint Miracle.
This foundation is quite runny but gives a really nice coverage and finish.

I also used my Garnier BB Cream roll on under the eyes to help cover up dark circles.

Finally set with Revlon Nearly Naked Pressed Powder in 010 Fair.

 Step 3. Eye primer

If you can then prep your eyes,
I am using Urban Decay Primer Potion because it's just simply amazing!

You want to make sure to blend it in right up to your brow bone because you want your highlighter to stay put as well.
 Step 4. Brows

So it's time to fill in your brows, I'm using Soap and Glory Arch de Triumph combined with a brow brush to make the colour look more natural.
It's not that my brows are sparse but more so that they are very fair coloured so it dramatically changes my look when I fill them in.

My suggestion is that you can do one of 2 things for your brow shape for this look.

The first is that you can do what I've done which is try to go for an Audrey

Hepburn style and make your brows straighter with a slight arch, obviously her brows are a lot darker than mine but it would look strange on me.

Second, you could hike your arch up slightly more than normal to give your look that super sexy edge. With both styles, try and thicken your inner brow and make them look fuller, but not too much or it'll look like you've got ferrets stuck to your brow bone!

 Step 5. Eye Shadow

I'm using the Urban Decay Naked palette for this.

So use a highlighter on your brow bone, I have used Virgin for this because it has a slight shimmer.
The lid colour is Naked, the crease colour is Buck and the outer corner colour is Darkhorse.

Be sure to blend these well and give a neutral smoky effect to your eyes.
 Step 6. Eye Liner

I'm using a Maybelline gel eyeliner with a small flat round tip brush.

Draw a fluid thick black line and then wing it slightly for a cat like effect, this will help later when you apply your mascara as it will make your lashes look fuller, longer and with and nice curl.
 Step 7. Mascara

I have used the Maybelline Rocket Volum' mascara for this because I feel thatit does give my lashes a bit more lift.

My lashes are also quite short so they are difficult to see.


 Enter the lash shot, I've purposely took a photo from this angle so you can see my lashes :)
They aren't clumped but they look like they've got volume!
 Finally Step 8. Lips

I've taken a few photos for this one because I think that if you aren't brave enough for the daring red lips then you should at least have options.

<-- This one is a nude lip gloss, this is from the Apocalips range by Rimmel and is called 'Nude Eclipse'.
 <-- This is a more colourful but still playing it safe beige pink.
This is also from the Rimel Apocalips range and it is called 'Celestial'.
Finally the red lips :)

I am using Maybelline Superstay 10 Tint Gloss in Endless Ruby for this look.


I think this is just so vibrant and classy when paired with neutral eyes and it doesn't look over the top.

I really do think that every girl should have a good red lip colour :)

I hope you like this tutorial and let me know if you want to see anything different :)

-Ruby

Friday, 8 February 2013

My Make Up Today :)

I was so happy with my make up today I thought I'd share it with you all!

Please ignore the fact that my skin is a little red - I have a few blemishes and I need to buy some concealer haha :)

So here's what I used for this everyday, very natural look;

1. Skin Prep - First I cleansed my face with Neutrogena Visibly Clear Pink Grapefruit Wash to, secondly I used the Neutrogena Pink Grapefruit Moisturiser to stop my skin from getting dry, Lastly I sprayed M.A.C Fix+ evenly over my fce to try and reduce the redness (It really helped.)

2. Foundation - M.A.C Studio Sculpt in NC15 applied with the M.A.C 190 foundation brush.

3. Brows - Soap and Glory Arch de Triumph brow pencil and highlighter duo, Not too heavy so the colour looks unnatural but enough to make your eyebrows look defined, brow bone also lightly highlighted and blended

4. Eyes - No7 Smoky Rose Quad, the frosted white colour for brow highlighter and the light rose gold for all over lid colour.
Maybelline gel eyeliner- small winged effect for cat eyes and finished with No7 Lash 360 mascara applied to the top lashes.

5. Lips - 17 lipgloss, it was a sparkly sheer nude colour but I don't think it shows up too well on camera.

I really hope you like this look and I may decide to do a tutorial on this in the coming weeks :)
-Ruby