Saturday, 30 March 2013

L'Oreal Nude Magique BB Cream Review

Happy Easter Everyone!
I decided that I would do another review today and my review is on the L'Oreal Nude Magique BB Cream in Light. I really wanted to try a BB cream because everyone has been talking about them and how wonderful they are so I wanted to see if it was really worth the hype, I bought this for £9.99 in Boots and I have to say that I am really disappointed :( 

This is what the product looks like. I really like the fact it's in a squeezy tube and I love the colour of the metallic purple on the packaging, it's like a lilac colour and it just looks really pretty.

In all honesty, this is the only redeeming feature of this product.

 It has this precise nozzle which is all right but it isn't anything which really made it stand out as being amazing and made me even like the product.

I found that it could actually be a hindrance to the product because it just means you take longer getting the product out of the tube.
 It's also quite runny which I really don't like. If you've read my previous posts then you might know that I much prefer a thicker product when it comes to foundation-y type make up. And I might have been able to get past this if the product was actually good.
 I looked really sort of grey when I put it on my hand to begin with and I was quite confused by this but I just went with it and as I rubbed it in it changed colour. Here's why I really don't like it - I didn't realise that it was going to change colour and I only found this out when my boyfriend pointed this out to me whilst we were in broad daylight and in public. I felt mortified, I had these orange streaks going down my neck.


So as I've blended it out you can tell that it is a few shades and tones too dark for my skin. I suppose I've learnt my lesson about buying something which is labelled as 'light' and doesn't have a tester.

Don't get me wrong, I might try a BB cream again but certainly not this one.


So, if you have any suggestions of BB creams that I should try then please let me know and I'll try to do a review on it :)

I hope you enjoyed this review and let me know of anything else you'd like to see reviewed.
-Ruby   

Sunday, 10 March 2013

Lancome Hypnose Star Review

So as you may have read from an earlier post, I went shopping at the Lancome counter. If you haven't read it yet then here it is --> www.meplusmymakeup.blogspot.co.uk/2013/03/shopping-at-lancome-counter.html

And well I got myself a few goodies but as I have had a change to get a good try of the mascara, then I thought I'd do a review of it. So here is my review of Hypnose Star.


First of all, I love the packaging. I can't stress this enough, this has to be the most amazing packaging I have ever seen.

It's curvy in shape and it's glittery!!! It's just soo pretty.
I spent ages just twirling it around in my hand, watching the light hit of the glitter. Yes I'm that weird.


Here's a step by step result of this mascara.

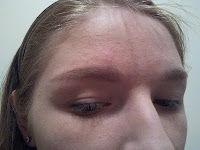
So please excuse my face, I have absolutely no make up on (Minus whatever is left from me trying to remove make up the night before :S)

I have virtually no eyelashes, they are so short and fair so I need all the help I can get when it comes to this. 

ALSO If anyone has any tips on how to get longer lashes then leave a comment :)
They advise that you use the longer fibres to lengthen and then the super short fibres to volumise.

The brush is a little strange, not something I've seen before, it is tapered to match your eye shape and has 2 sides which are completely flat.

This picture was taken after I used the long fibres to lengthen my lashes and I think it does an amazing job.


This is after I used the volumising side, it doesn't look much different but the lashes are definitely fuller.

I haven't done my lower lashes yet just to show yo a little bit of difference.
This is the final result. My lashes look so much longer and fuller than before. I am so glad I chose this mascara.

Though it was a little expensive, I know I'm getting my moneys worth out of it :)


Let me know what you think of this mascara, or what mascara you really like :)
-Ruby

Elvive Extraordinary Oil Miracle Hair Perfecter Review

I have been working on this one for a while because I thought it might take a bit of time to see any true results on this product.

This is the Elvive Extraordinary Oil Miracle Hair Perfecter and you can get it for either 'All Hair Types' or 'Coloured hair'.

And though my hair is coloured I used the all hair types formula, because that's the sample that I had but the picture is of the coloured hair formula.

So first of all I'll talk about the actual packaging of the product, because actually I think it's worth mentioning.

- This is the standard packaging and it comes in an amber coloured glass bottle and I love that it's glass and not plastic because it just looks so much better.

It also comes with a pump, standard to this style product, which is great as it makes it easier to use :)
I honestly don't think I'd bother with hair products like this if it didn't have a pump because I just think the mess wouldn't be worth it.

I used the sample packet to begin with (which is why I mention about how messy it is) and this comes with about 2/3 uses, maybe more, depending on thickness and length of your hair.


So, the actual product:

Consistency:
It is really runny! It nearly ran off my hand because I wasn't expecting that it would be that thin.

Colour:
This is completely clear, at least for the all hair types formula. I don't know if the coloured hair version would have any sort of tint to it.

Smell:
I couldn't really smell anything from this product, I think the was a slight fragrance but nothing noticeable. which is some respects is good, because it could conflict with the scent of your shampoo/conditioner/any other hair product you use. However, I have used some oils which smell amazing when you use them. So it really depends on your preference but overall I think this is a good thing.

Application:
I like to rub this into my hands to slightly warm up the product before applying to my hair and it says you can use it 3 different ways - Before shampooing, before styling or as a finishing touch. Personally I use it before styling when my hair is still wet because I think that drying it into the hair gives a better finish, so you're not washing away he product and your not at risk of applying too much and making your hair look greasy.

I always find that I really don't need to apply that much, they recommend that you use 2/3 pumps on long hair but I only use 1 because it spreads quite far when your hair is wet and I still end up with left over on my hands but I just rub it in because I'm sure that it will be very nourishing for your skin and nails.

Finish:
After using this product my hair feels so much more controlled and just so soft.

In conclusion, I really like this product and I will definitely be using it in the future, it's such a nice product and it's only £9.99 from boots which, pound for pound, is a lot cheaper than other hair oils on the market.

I really hope that you like this review, let me know what your thoughts are :)
-Ruby

Saturday, 2 March 2013

Shopping at the Lancome Counter!

I know I've done a few posts today and that one of them was a haul, but I thought that because I bought these today that it shouldn't count.

So I was at the Lancome counter just having a look but knowing me I can't resist buying make up so I got a few things :)


This is the Hypnose Star Mascara and I was soo drawn to this version of Hypnose because the tube is sparkly! and it was just so appealing, it was either this one or Hypnose Doll Eyes. I haven't used this yet but I am really excited. The lady at the counter said that with the Hypnose formula you can reapply the mascara morning, noon or night and it won't get clumpy. So I am looking forward to trying this and I'll give you all an update on that.


This is the Color Fever Gloss in Sparkling Light. This is a clear gloss with a lot of sparkle and I thought this would be great over any lip colour. The only thing I am worried about is that the wand will get discoloured when I use it :( I want it to stay pretty and clean.


 BUT THAT'S NOT ALL!!!!
The lady at the counter said that when you buy 2 Lancome products, you get a free gift! and what a gift it was!
The amount of stuff I got was amazing. I spent £42 and got the free gift (it's not really free though) which is work £90. So I came away with £132 worth of Lancome products.
So this is what I got;


Gel Eclat Cleansing Face Wash              Tonique Douceur Toner                           Genifique Youth Serum


Hydra Zen Moisturiser                            Vissionaire Skin Correcter                       Juicy Tubes Lip Gloss


                                     Hydra Zen Yeux Eye Cream         Hypnose Mascara


What a great amount of stuff, considering some of it is full size!
I am soo excited to use this stuff :)
Let me know what your favourite Lancome products are
-Ruby


Classic 50s Make Up Tutorial

I had to test out some of my new make up and I thought it was a perfect time to do another tutorial!

So this is going to be a 50s/ classic sexy look which is great for all hair/skin colours.
Remember, if you have pale skin go for red which have bluish undertones.


Step 1. Cleanse

You want to start off with a fresh clean face, as always.

I have cleansed with Neutrogena   Pink Grapefruit Face Wash,
moisturised with Neutrogena Pink Grapefruit moisturiser and then sprayed a little MAC Fix+.

So just do your normal skin cleansing routine, just whatever suits your skin type :)
 Step 2. Face

I have put my hair back and applied 2 layers of foundation to help get better cover.

I'm using a sample of the new Lancome Teint Miracle.
This foundation is quite runny but gives a really nice coverage and finish.

I also used my Garnier BB Cream roll on under the eyes to help cover up dark circles.

Finally set with Revlon Nearly Naked Pressed Powder in 010 Fair.

 Step 3. Eye primer

If you can then prep your eyes,
I am using Urban Decay Primer Potion because it's just simply amazing!

You want to make sure to blend it in right up to your brow bone because you want your highlighter to stay put as well.
 Step 4. Brows

So it's time to fill in your brows, I'm using Soap and Glory Arch de Triumph combined with a brow brush to make the colour look more natural.
It's not that my brows are sparse but more so that they are very fair coloured so it dramatically changes my look when I fill them in.

My suggestion is that you can do one of 2 things for your brow shape for this look.

The first is that you can do what I've done which is try to go for an Audrey

Hepburn style and make your brows straighter with a slight arch, obviously her brows are a lot darker than mine but it would look strange on me.

Second, you could hike your arch up slightly more than normal to give your look that super sexy edge. With both styles, try and thicken your inner brow and make them look fuller, but not too much or it'll look like you've got ferrets stuck to your brow bone!

 Step 5. Eye Shadow

I'm using the Urban Decay Naked palette for this.

So use a highlighter on your brow bone, I have used Virgin for this because it has a slight shimmer.
The lid colour is Naked, the crease colour is Buck and the outer corner colour is Darkhorse.

Be sure to blend these well and give a neutral smoky effect to your eyes.
 Step 6. Eye Liner

I'm using a Maybelline gel eyeliner with a small flat round tip brush.

Draw a fluid thick black line and then wing it slightly for a cat like effect, this will help later when you apply your mascara as it will make your lashes look fuller, longer and with and nice curl.
 Step 7. Mascara

I have used the Maybelline Rocket Volum' mascara for this because I feel thatit does give my lashes a bit more lift.

My lashes are also quite short so they are difficult to see.


 Enter the lash shot, I've purposely took a photo from this angle so you can see my lashes :)
They aren't clumped but they look like they've got volume!
 Finally Step 8. Lips

I've taken a few photos for this one because I think that if you aren't brave enough for the daring red lips then you should at least have options.

<-- This one is a nude lip gloss, this is from the Apocalips range by Rimmel and is called 'Nude Eclipse'.
 <-- This is a more colourful but still playing it safe beige pink.
This is also from the Rimel Apocalips range and it is called 'Celestial'.
Finally the red lips :)

I am using Maybelline Superstay 10 Tint Gloss in Endless Ruby for this look.


I think this is just so vibrant and classy when paired with neutral eyes and it doesn't look over the top.

I really do think that every girl should have a good red lip colour :)

I hope you like this tutorial and let me know if you want to see anything different :)

-Ruby

Haul! (Sorry about the lateness)

I was planning to do this haul on YouTube,but as seen as I can't get my camera working I s'pose it has to be a blog entry.

It was actually quite a while ago since I went shopping and got these products but now I get to show you then and what I think of them so far :)

Face-


The first item is one I actually bought today. This has been recommended time and time and again and this product is.... Revlon Nearly Naked Pressed Powder!!


I had seen this particular product being raved about ad as it's a fairly new release I thought it would be good to give it a try :)

I have very pale skin so I bought the lightest one that I could find (I don't know if they do a translucent powder). The shade I bought is 010 Fair.

The packaging is fairly simple and it does come with a little rectangle sponge (which I haven't used), I use a powder brush and if I'm honest, whilst I still love this product and I will be using it everyday, I was expecting it to stay matte for longer.
The coverage is great and leaves a very smooth texture, so I really do love this product and I don't want to sound like I'm bashing it but I just wish that I wouldn't have to blot or reapply throughout the day. You can find this product at most Revlon suppliers (Boots, Superdrug, etc.) and it retails for around £7.99


The other face product I bought was the Garnier BB Cream Miracle Skin Perfecter.


I had been after a concealer for a while because as I was starting out in beauty blogging, I realised that I might have to show my face to you all from time to time. I don't notice the dark circles under my eyes usually and it is only when I take a picture that I see them, so obviously  needed to invest.

There were several things that attracted me to this product. First, the fact it is new. Second, because it is a BB cream. Third, because I wanted something that would actually help treat dark circles, which it claims to do.


This has a rollerball applicator and I I thin t isn't important but it is soothing when you put it on.Personally, I use my ring finger to blend this in but you can use a concealer brush and it will work just as well.

Don't be put off by the fat that t is a little yellwey because it is supposed to be like that and when you blend it in you won't even notice it!
This retails for £9.99 (I think)


The next lot of products are eye products :)

I think that lately I have spent a fair bit on eye products, for me at least, but they are all essentials!

The first Product I'm bought was a beauty guru favourite and this is the Urban Decay Naked Palette.

So from left to right the colours are;
Virgin, Sin, Naked, Sidecar, Buck, Half Baked, Smog, Darkhorse, Toasted, Hustle, Creep and Gunmetal.
I love this palette because its ALL neutrals which I love for everyday usage, so even though I thought that it was a little pricey, I know I'm going to use it a lot.

I also loved that it came with a proper eye shadow brush because I don't use the little sponge applicators, I think they're too small and fiddly. The palette also comes with a sample size of the primer potion (which I was planning to buy any way!)

It's just a tiny little tube which as a wand applicator with the sponge at a slight angle.
I have used this everyday since I got it because it is honestly the most amazing primer! I apply my make up around 7:00am Mon-Fri and by 5:00pm, when I come home, my make up is still perfect, no smudges at all :)

The palette and primer potion sample retail for £36 :)


Next, I was in need of a new mascara because I was using No7 Lash 360 (Which I love) but I was running really low on it and wanted to try something different. I was also using MAC Zoom Fast Black Lash and I've had it for about 3 and a bit years so I'm sure that it's probably not safe to use :S


I went for the Maybelline Rocket Volum' Water poof mascara in black.

I went for the water proof version because no matter what I do it will always smudge. I rarely apply mascara to my bottom lashes any more because of this and also because I think that it you have fair coloured lashes then this can make your eyes look bigger.


This is the applicator, the bristles are actually fairly small but the barrel is big and this helps to curl your lashes and get a full coverage.

I really hate that when you buy a new mascara you end up with loads of product coming out and you have to spend time trying to get rid of it before you apply it. But I didn't have to so that with this mascara which  a really pleased about.
This retails for £7.99


I also bought another set of neutral eye shadows! I only do this because they will go with almost any lip colour you have and you don't have to sit planning your make up, or end up wasting a lipstick/ lip gloss because you never use it because it doesn't go with anything!

This is the Revlon ColorStay 16 Hour Eye shadow quad in 515 adventurous
And this has a shimmery cream highlighter, shimmery medium brown, shimmery green/brown and a dark matte brown. This is great if you want to do a neutral smoky eye (which is always for me!)
They have a little guide on the back on how o apply but personally I do this;

Apply the highlighter to the brow bone (standard), use the medium shimmery brown all over the lid, then apply the shimmery green/brown into your crease to add depth, next use the matte dark brown in the outer corner to darken the eyes slightly, finally blend until smoky!

This product does actually stay quite a long time (I reckon if I teamed it us with the UD Primer Potion it would become permanent!) and they do it in a variety of colours :) This retails for £7.99


Next up it's lip products!

This first one is my absolute godsend! I freaking love this lip stain!!
This is the Maybelline Superstay 10 Tint Gloss

 I have this is Endless Ruby which is a deep cherry red and what I love is that you can layer up the colour :). Provided that you aren't drinking anything without a straw, this will stay put for hours!

It smells amazing too, it's like either cherry or berries but I just want to eat it.

I have literally been wearing this gloss for 2 days straight.
It retails for I think £7.99


The next one is one which I had heard people talking about and I tried it out and I now have 3 of them because they are soo good.

 The Rimmel Apocalips collection came out a few months ago and they have 8 colours.
I have Big Bang (bright red), Nude Eclipse (nude) and Celestial (beige pink)

They have a very strange applicator, it's like a a normal wand but it has a pocket so that you get more product come out at once :)

They also have a slight watermelon smell to them in my opinion but apparently I'm the only one who thinks this.

They are £7.99 normally but when I got them they were £5.99 (They could still be) and were on a 3 for 2 from Boots


Lastly, nails!

I only bought 1 new nail varnish this month and it is Essie in Mint Candy Apple;

This is a pastel green which is very on trend this Spring.
In fact all pastel colours will be in trend.

I have a gold watch on and I really don't wear a lot of gold but as this actually means something to me then I wear it all the time. However, I think that this particular pastel green goes really well with gold as an accent colour so maybe you want to try doing something like that with your outfit.

The nail polish is very glossy and applies quite smoothly which I am really happy about

Essie nail polishes usually retail for around £7.99


I really hope you like me reviews on these products and let me know which products you have been loving lately :)

-Ruby