So I'm going to run through, step by step, how you can get this nail design :)
So, what you will need^;
- Tape (For masking the area around your nails)
- Nail Polish Remover (To clean up any mess around the nail)
- Cotton Buds/Q Tips (Use with nail polish remover)
- Cup of Water (To do the Water Marble technique)
- Cocktail Sticks (To draw pattern in the water)
- Selection of nail polishes, inc. Top/base coat and a base colour.
- Nail File/Filing tool to even out nail lengths.
 So, step 1.
Remove any nail polish that you have on already.
Make sure that your hands are completely clean to stop any dust/dirt getting into the water.
Step 2.
If your nails are a little uneven then grab a nail file and file down any areas that need a little work.
I use the No7 Electric file, they can be a little difficult to control but do cut down on the time.
Step 3.
You need to prep your nails for the technique.
To begin with use a clear base coat on your nails and let it thoroughly dry.
Next, Choose a base colour. I recommend using white or pale nude as this will produce the best colour results.
You can skip the base colour if you want the finish to be sheer.
Step 4.
Not too sure if you can see this too well but I have taped around my nails so that the design doesn't transfer onto my skin :)
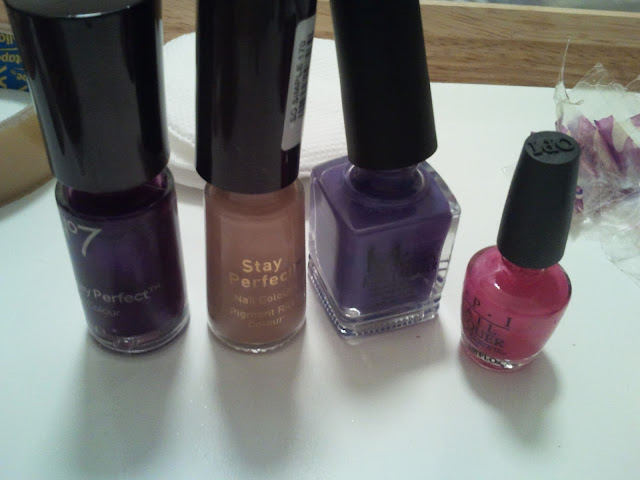
So I selected my colours and they are (From left to right);
- No7 Stay Perfect in Vivid Violet
- No7 Stay Perfect in So Simple
-Misa Nail Lacquer in Total Eclipse of the Heart
-OPI Brights in That's Hot! Pink
 Step 5.
What you need to do is carefully drop your first colour into the water, it should spread out and become very opaque, this is good because as you build the colours it will become more visible.
So once the first colour has spread, drop the second colour directly in the middle of the first and then let that one spread.
Keep doing this with about 3/4 colours until you build a colour ring which looks similar to the picture, you can add more rings if you like so you can build up the intensity. You need to build the ring as fast as possible otherwise it will dry and you won't be able to draw your pattern.
 Step 6.
Take your cocktail stick and gently draw lines in the water, dragging the polish as you go.
I decided to make the flower patter you can see.
You want to be careful not to put the stick in too deep otherwise the colour ring will split and the colour will bleed out.
So as soon you have your desired pattern, you are ready to do the transfer.
Step 7.
Line up your nail with the part of the pattern you want to transfer and dunk your nail in. Keep your finger in the water until you have swept up the excess polish with a cocktail stick.
Your nails should end up something like the picture, hopefully with less mistakes :)
My nails are a little messy right now so what you need to do next is take a cotton bud/q tip and clean around any areas where polish isn't supposed to be.
So this is what the finished product should be!
Cute Water Marbled nails with bright pinks, peaches and purples :)
I really hope you like this nail tutorial :)
Have fun experimenting with this technique and have a great Valentine's Day!
-Ruby


No comments:
Post a Comment
I love to read everyone's thoughts, comments and opinions and I'll always try to reply :)